What is a baby sling?
A baby carrier (also known as a 'baby sling', which is the name we'll use for this article) is a garment worn over one shoulder and across the body, with enough fabric to allow your baby to sit in it comfortably. It's usually made of stretchy material such as jersey cotton or woven wrap fabrics.
What does it look like?
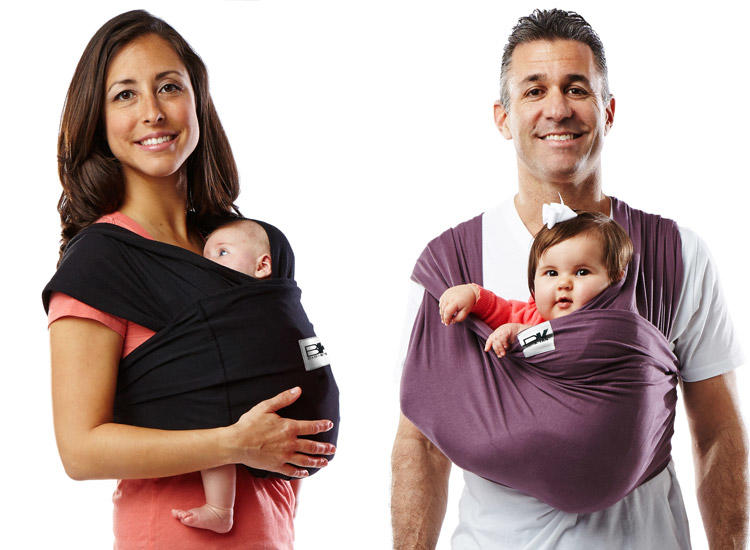
The two most popular styles of baby carriers are the pouch and meh dai (pronounced 'me-high').
A pouch is like a tube with enough fabric for your baby to fit in. It has no waist or shoulder straps; you simply pop one arm through each end, then pull them over your head. The stretchy material molds itself around your body shape.
Meh dais also have no waistband (except when used by children), but they do have wide shoulder straps which you slip on like a backpack, then throw the ends of the carrier over your shoulder before putting your baby inside.
Pouches are designed to be worn against your skin; meh dais usually aren't, so if there's only one of you wearing the carrier, you need to be wearing a top that will cover it.
Which one is the most common?
Pouches are definitely more popular than meh dais. They're very quick and easy to put on, so they're good for dads! Meh dais can be a bit trickier to learn how to use at first, but once you've got the knack of them, they offer better back support and spread your baby's weight over both shoulders rather than just one.
What are the benefits?
DIY baby carriers are easy to make, and if made correctly they can last for years. This makes them good value for money compared to buying commercial carriers, which usually wear out after about 6 months. Plus, if you get into making them yourself, it's possible to create unusual designs or new styles not available in stores - so your homemade carrier maybe something completely unique!
But isn't it difficult to use?
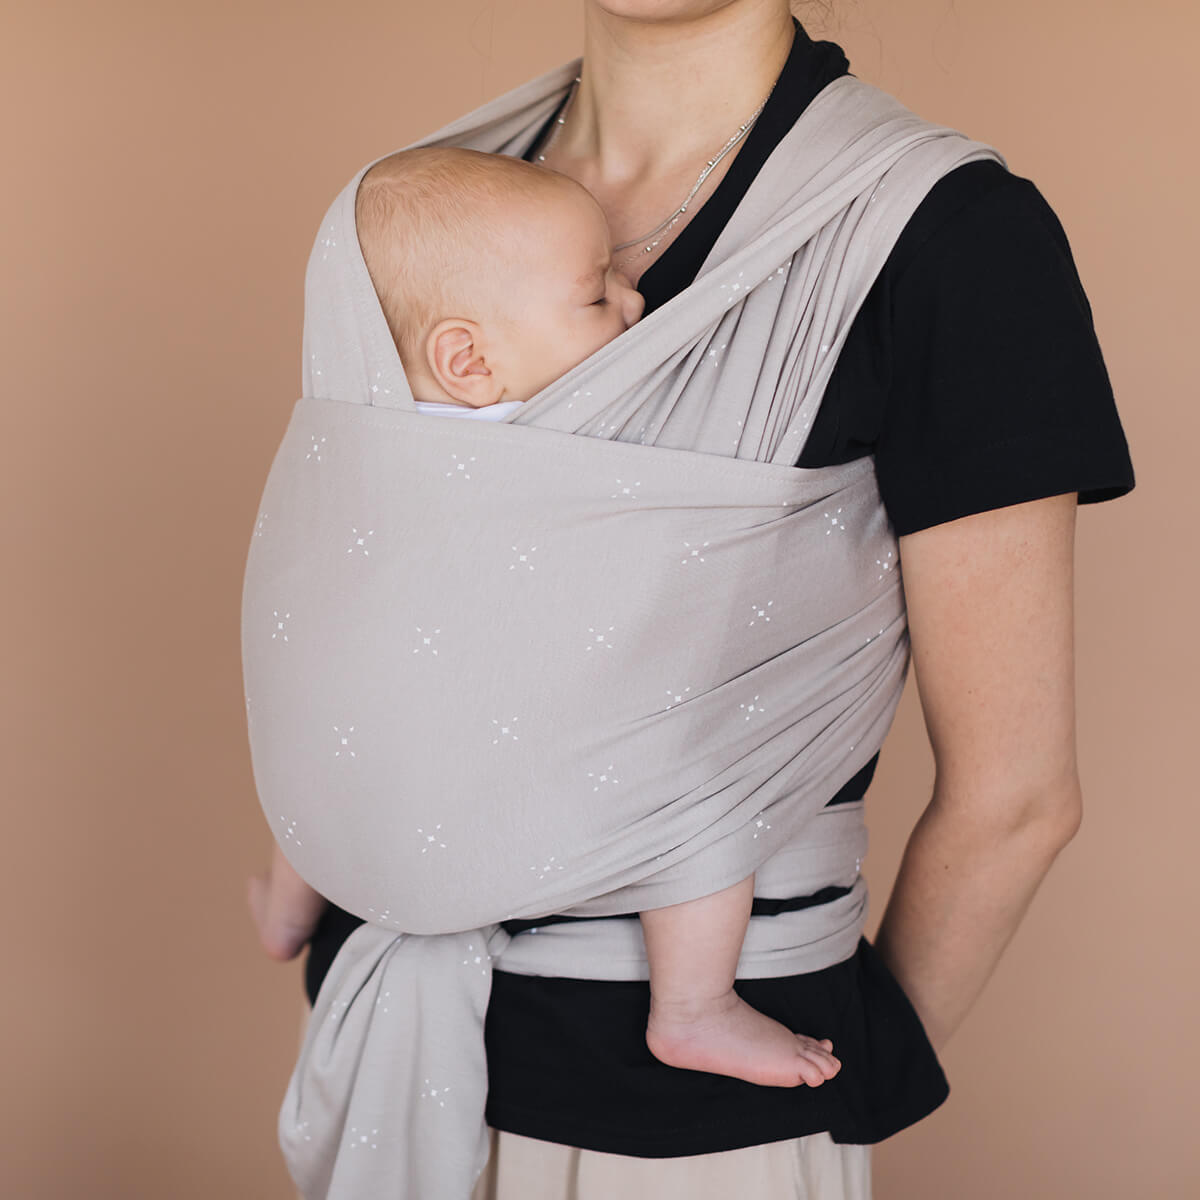
Babies under six months old have no head control so should always be worn facing inwards on your front (most slings are designed for this), while older babies can face outwards until they're confident enough to sit up unaided.
For most wearers, a baby carrier is easier and more comfortable than a stroller or buggy. It leaves both of your hands-free for other things like pushing the pram with one hand and holding your shopping in the other (very important)! It also means you can stop for lunch when out with your baby - just put them in the sling and rest their weight on it across your chest while you eat.
But what about breastfeeding?
If you wear your baby facing inwards, you'll be able to breastfeed discreetly without anyone knowing (if someone sees they'll think she's asleep). Because it's quite easy to nurse her while walking along, this makes life much easier for those who don't have a free arm to lean the pram against for nursing.
How can you choose the proper fabric?
The material needs to be stretchy, so it will mold itself to your body shape when you put it on. This makes baby carriers more comfortable than any other type of clothing - in fact, many babies prefer being carried in a carrier compared with being carried in arms because they can feel their parent's heartbeat against them.
This is why the design of good carrier molds around your baby, rather than trying to hold them still.
Unfortunately, not all fabrics are suitable for making a baby sling! The best-suited materials are stretchy knits such as jersey cotton or bamboo viscose. It's worth noting that rayon from bamboo viscose is easier to wear and less likely to get too hot during summer, but doesn't last as long as cotton.
Also, choose a comfortable material for yourself. If you're not wearing something that's soft against your skin, the fabric will rub against your skin causing irritation and chafing.
What does it cost?
A baby carrier can be made fairly cheaply if you don't want to spend too much on one - just buy some jersey cotton (about £3-£4) and make one (see instructions below). But if you decide on buying stretchy woven wrap fabrics instead, expect to pay about £15 per meter.
Handmade carriers made from this sort of fabric are usually extremely comfortable; they look amazing; and because they've been designed with people in mind rather than animals, there's no pulling or pressure on your baby's spine.
How can I make a pouch sling?
You will need such materials: two rectangles – one of fabric and another of lining – sew-on velcro, press studs or poppers, a buckle for the waist strap, and an O-ring to attach your sling with. You can source all these materials cheaply from eBay or a sewing shop if they don't carry them in stock.
To make this baby carrier you need to:
Cut out two pieces of fabric with dimensions 55 inches by 10 inches, with the right side of the fabric facing each other (this will give you a 'tube' shape and is why it's good to use jersey cotton that doesn't fray).
Sew up both long edges with an overstitch (don't worry about not catching the lining inside as this won't show when finished). Sew a piece of sew-on velcro to the short edges 5-6 inches from each end – your DIY baby sling is now complete!
How do I use it?
To put on, simply pull one arm through each end and pull the carrier over your head. Pull the straps up onto your shoulders, then adjust them so they're not too loose or too tight across your chest.
Finally, attach the waistband using either poppers or buckle. Your DIY baby sling is now ready for use! Remember to always place your baby inside facing inwards (for newborns).
How to make a meh-dai?
You will need such materials as:
3 yards of fabric.
1 yard of 8" to 10" ribbon for the waistband tie
2 yards of 5/8" to 1" strap webbing or belting.
You can also use a buckle if you like instead of the webbing and make it adjustable (strap webbing is cheaper). The ribbon should be 4 times longer than your waist measurement.
Start by finding the center point on one end and mark it with a pin at least 11 ½ inches long. Fold-down approximately 3 ½" and press, either with an iron or using this method: hold in place until cool enough to touch.
Pinch about an inch below where you just pressed and pleat (folding evenly) over to the opposite side, pressing again. Do this on both sides of the center mark and continue until you reach a little more than 1 ½" from where you started. Sew across using small stitches to secure your pleats.
To create the rings, cut two pieces of strap webbing or belting 2 ½" long by 1 ¼". Fold in half and sew securely along the length. Thread one end through an O-ring and fold back over itself about ½", then sew in place so it can't move around on you while sewing your carrier together.
Slip the other ring onto the ties before sewing them to each end of your fabric strip piece (the one with a center mark). Place it about ¾ of an inch below where the center mark is, leaving room for the ring you just attached. Sew securely along both sides of this entire strip.
Now fold your fabric in half so it measures approximately 27" and stitch across the open ends only (along the bottom and top). Leave a 2-3" opening on one side to turn right side out. Clip your corners and turn right side out. Fold-down ½" at each end and press firmly all around your edges, then sew neatly in place close to the edge, taking small backstitches at each start/stop point.
To add webbing or belting straps: Place 4 rings evenly spaced along one long edge of your carrier piece with an extra 1' between them and where you started/ended stitching. Sew in place, starting under the rings and coming back up again to secure you have a good hold.
Fold over any excess fabric at either end to your inside piece (lining) and sew neatly in place. To attach the straps, thread one through each ring from the outside of your carrier piece to the inside, then fold down 1 ½" on each strap. Press this fold firmly, then topstitch close to the edge all around your carrier piece.
To make sure your baby is laying correctly when using this kind of sling: make sure her weight is resting on your hips/waistline instead of pulling down onto your shoulders; however, ensure not too much weight is concentrated thereby spreading it across your entire lower back area evenly.
How can you put the baby into a sling?
Pick up the baby and ensure she is securely and correctly placed in your carrier, i.e. on your back facing towards you or away from you (depending on the type of carrier you have), her weight resting on your hips/waistline instead of pulling down onto your shoulders; however, ensure not too much weight is concentrated thereby spreading it across your entire lower back area evenly.
Steps:
- Ensure that the fabric ends with a pocket for head support does not face towards you.
- Hold sling slightly away from yourself around waist level, one hand holding both shoulder straps and the other pushing the bottom strap through one of the rings (or under and over elastic if no ring used).
- Put one arm through the other strap and then position the baby, ensuring her weight is resting on your hips/waistline.
- Bring the fabric back up over your shoulder and slip the head support pouch around the baby's neck (if using).
- Adjust straps accordingly for comfort and support at the waist and shoulders. It might help to sit down with the sling wrapped around you before you stand up with it to make sure everything feels right and comfortable all the way through.
What sizes of rings should I use?
You can buy O-rings made especially for this purpose or any extra large-sized ring that will fit at least one end of your webbing/belting (usually available in hardware stores; they're found as part of belt buckles). The length of your straps should be adjustable enough to ensure the correct fit around you (or baby/toddler, depending on what you're making).
Does the length of the sling make any difference?
As this carrier is worn at the waist or hip level, it doesn't matter if you are very tall or short; however, if you're sewing one for someone else (e.g. expecting parents), you might want to consider cutting 2 pieces slightly longer than required and then overlock them together over the length before stitching end seams closed.
This will give additional length to enable taller people to wear it comfortably. Although not strictly necessary, a good idea would be to add an extra piece of fabric along the top edge at the center back for this purpose if the one you have cut is not long enough.
Can I use sew-on snaps instead of rings?
Yes – anything that will hold your sling together securely and distribute the weight evenly should do fine. Snap fasteners (of any type) and hooks & eyes are the easiest to find in stores so if you have access to either of these, they can be used instead.
Safety tips: placing your baby correctly
Your baby should be placed on your back with her weight resting on your hips/waistline instead of pulling down onto your shoulders; however, ensure not too much weight is concentrated thereby spreading it across your entire lower back area evenly.
The carrier should be placed so that the bottom edge is at waist level, with lower straps around hips and upper straps around shoulders (see below). Ensure head support does not face towards you.
There are also safety precautions for a mom as well when using the baby carrier. Make sure that your little one doesn't have any blanket or scarf in his/her neck when you are carrying them in a front-facing position. This will choke them and it is not safe either for mom to carry the baby with a scarf around her neck so make sure there is no scarf in her neck when you are holding them in a front-facing position.