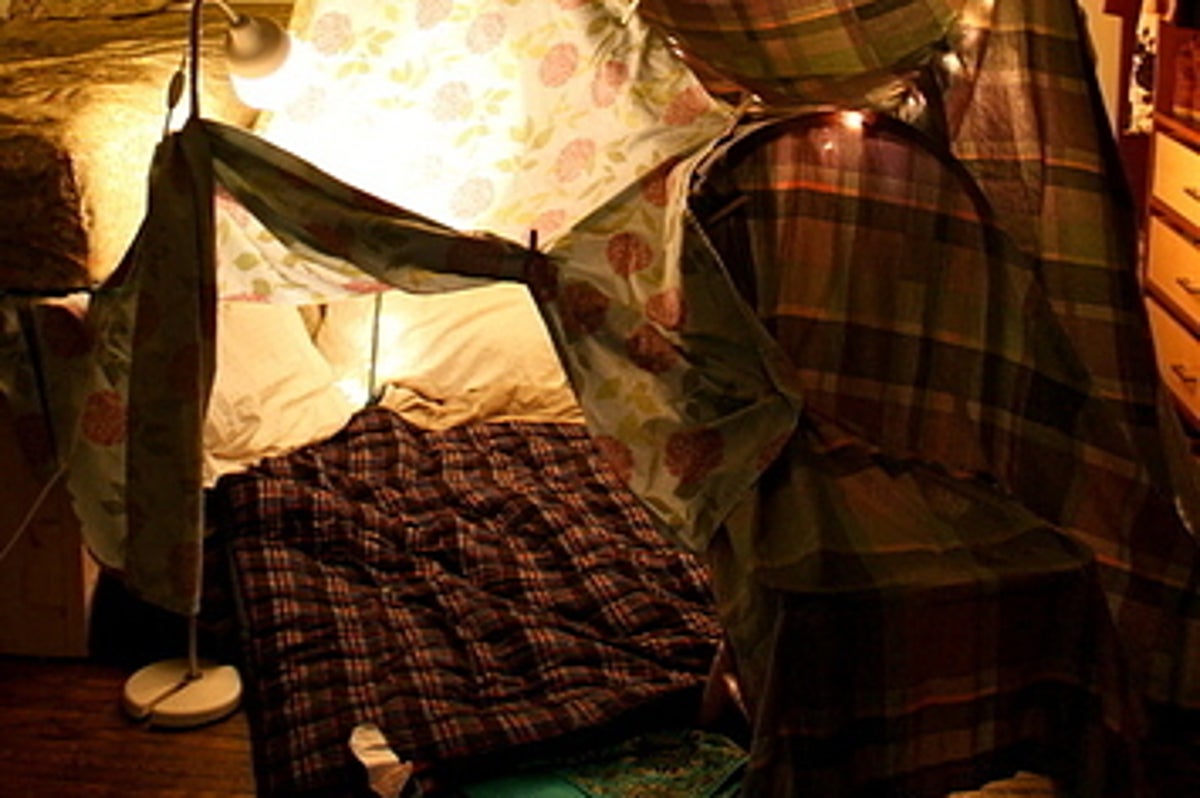
What is a blanket fort and why does your baby need it?
A blanket fort is a fun place for babies, toddlers, or even older kids to play. It can be moved around the room, set up in just minutes, and provide hours of fun exploring. It's also - when done right - comfy, safe, and warm!
If your child likes to be wrapped up in a blanket, this will likely be an instant hit. Even if they don't usually use blankets for comfort, you can bet they'll be excited to have their own 'little house' or cave to sit in and read a book or play with toys.
The best thing about a blanket fort is that it's easy to make and move around the room as needed. It's also inexpensive - you probably already have what you need at home! The obvious drawback is that it takes time and effort to set up each time you want one, but once it's done it provides enough fun for hours on end!
Blanket forts are great fun but definitely not the only way to play! Sometimes just having sheets on the floor is enough of an adventure and with adjustable size and shape and no set-up required, blankets will continue to provide hours of exploration as babies grow up. Blanket forts are most suited to playing inside where there's less chance of getting cold than if you were outside with them.
What should I use to make it?
Any sheets or blankets will do! You might want to stick to soft fabrics like cotton, silk, satin, flannel - these are all easy to fold and aren't too heavy on their own. If you're using a thicker material like fleece, for example, consider layering two stranded together so they won't weigh down your structure when draped over the top of each other.
Flannel also has the added bonus of being warm if you're building it in colder weather months. Also keep in mind that while you don't need any sewing skills, some folds may require basic knowledge so be careful not to rip the fabric.
How do I make one?
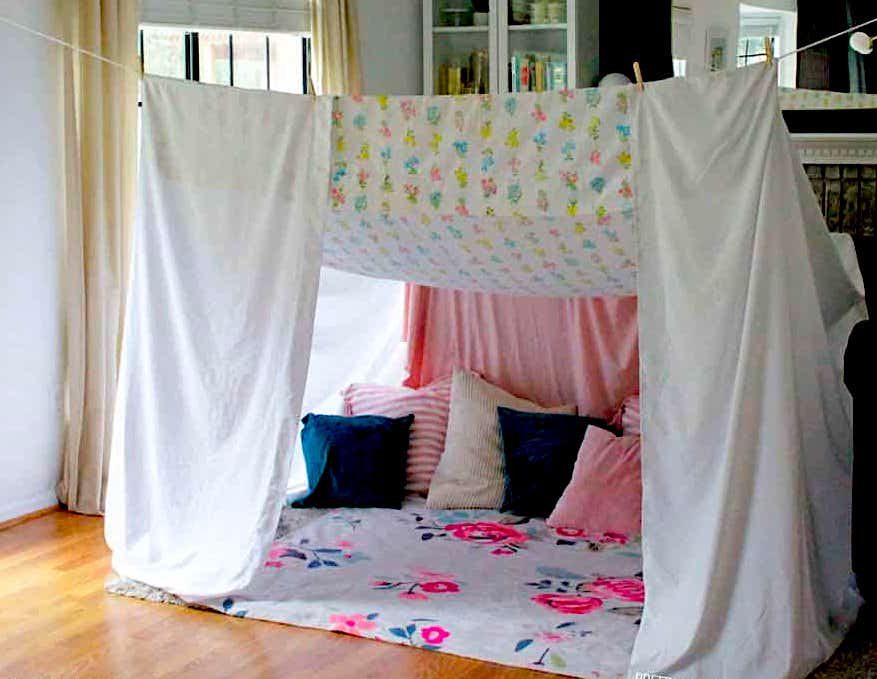
STEP 1: Fold your sheets in half width-wise. If you have anything larger than a twin-size bed (i.e., King), you will need additional sheets in order to cover the length.
STEP 2: Spread them out on your floor with the fold facing up towards the ceiling. Layer the blankets over the top so they overlap slightly (about three inches). Tuck these covers into each corner by bringing it diagonally across and slightly up, so you can fold the excess underneath.
STEP 3: Roll a sheet or blanket tightly and place it on one side of the fort. This will create a wall.
STEP 4: Repeat until your fort is complete. Use smaller sheets for 'windows' - hang them from part of the structure with safety pins to keep them in place, or just let them fall inside where they'll be out of the way but still provide light into your fort!
STEP 5: Once everything is set up, crawl inside and enjoy your new home! You can also use safety pins to attach the fabric to the outside if you want a more permanent structure that's not going anywhere when anyone crawls near it (like around a play area).
How do I fold it all up?
You can simply roll each sheet or blanket from the top down to get them out of the way quickly. Fold one side over itself a few times, then move on to the next sheet/blanket group until they are all rolled together into a tidy stack.
You may need to use your hands when folding thicker fabrics like fleece, but this is usually easy enough given they've been folded in half once already! Smaller blankets can be rolled inside bigger ones to save space when putting everything back. For larger forts, you'll probably need some sort of container or bag to transport everything in. Plastic storage tubs, large reusable totes, and even old luggage can all be used to hold your fort!
How long will it last?
If you want to build a smaller fort that collapses nearly flat, try using cardboard as walls and either tape or glue as supports on the inside. Another good material for this kind of build is foam board: lightweight and sturdy with plenty of insulation value.
Because these two options aren't as thick as blankets they're likely to need replacement every few days depending on how rough the usage is; but if you're willing to go through a little more work (and perhaps some special tools), you can use PVC pipe instead. These types of sheets won't have any tears or dents even after hundreds of uses!
What can I put in it?
Anything you want! Some ideas include pillows, stuffed animals, books and reading material, puzzles or games, snacks and drinks (be sure to place them somewhere they won't fall out easily), legos or other small building toys.
How do I make it safe?
If you're hoping to create a blanket fort in your living room, for example, be sure that everything is secure. You don't want anything falling onto or even near your child! Also remember that while the structure itself isn't going anywhere, the blankets and sheets can easily come loose and move around with any sort of activity happening inside (i.e., crawling). Make sure there's nothing else in the way that could get damaged if they shift around - this might mean moving other objects to another room if needed.
You may also want to keep an eye on things like candles or matches if you have them nearby (remember: not all kids are old enough to know what they are or not, so it's best to be cautious), matches if you have them nearby (babies and toddlers can get into anything, including open flame). You might also want to avoid using lights if you don't want the hassle of crawling inside after every time you turn them off.
Where should I put the fort?
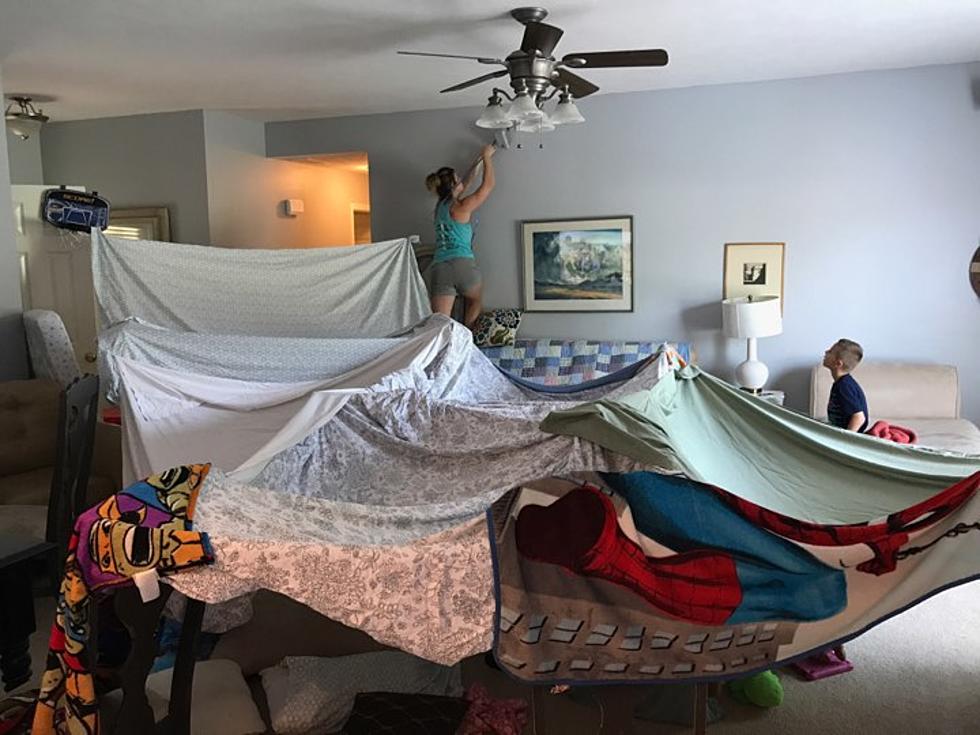
If you have enough room to set one up in your living room or kitchen, this is a great idea! It can be tucked under a table if there's not enough open floor space to lay all the sheets out flat.
Or, arrange two chairs so they're back-to-back and hang some sheets over the backs for an instant fort! If it's just you and baby playing, you can move it easily into another room later for bedtime. You could even take it outside on nice days, but be sure to keep it away from your little explorer as they crawl around - being exposed directly to sunlight will fade any colors quickly.
Also note, that if you're planning on having the fort up for longer periods of time, it will get very hot under there as soon as you close off all ventilation.
What if my baby is younger than expected?
Newborns and infants will enjoy your blanket structure just as much as older babies! You'll probably need to hold them in place while they try to pull themselves up or move around.
Once they can stand and walk with support, they'll be able to experience all the fun of a fort on their own! However, don't expect them to understand how to do things like climb in or out yet so be sure you can easily go in and get them if needed. And remember to keep any loose covers away from their little hands, mouths, or crawling paths.
How can you stile up the blanket fort?
Once you've got the basics down, it's easy to make a blanket fort more complex. Add pillows and stuffed animals inside. Hang sheets from nails or chairs to create rooms, windows, archways, tunnels... Anything! You can also color on or embellish your fort with fabric paints, markers, glitter glue pens - anything that has some staying power.
LED strips or neon tape can be a lot of fun too, but keep in mind that these will glow brighter under the blankets and sheets.
Cushions are a great idea to give a little extra insulation from the cold floor. However, be sure that whatever you use doesn't have any rough or sharp edges that might be a hazard for babies as they explore.
You can also use small boxes, storage bins, plastic containers - anything really - to create different levels and hideaway spaces inside your structure! Just make sure there is never any possibility of the baby getting stuck!
What if I need more room?
If it's just one or two babies playing with you, you can simply make the fort larger by adding more sheets. If this isn't enough space for everyone running around though, try making a few mini forts along one side of a larger sheet. Each child has their own space and a shared area for you to play on as well!
What about the ceiling?
If you have a blanket long enough, it can be used to cover any openings in addition to the walls. You can use furniture or sheets from other rooms to hang over any open doorways or gaps in the structure.
If this method is too cumbersome, try folding up another blanket and hanging it from the center of your ceiling like a tent top. If you're using lights inside your fort, make sure they are covered securely with cutouts before closing everything up. And again, maintain good ventilation if it's going to be up for a while!
How do I clean it?
Blanket forts - especially those filled with kids playing and getting dirty - are bound to get messy! For small stains, it's easy enough just to spot clean. Using a sponge or cloth dipped in water will work for most light soiling. If the fabric is too delicate for this kind of cleaning, try lightly vacuuming any loose debris and dust before wiping it down with a damp cloth.
If you used to paint, crayons, glitter, or other non-water-based objects inside your fort then take extra care when removing them from the sheets! The safest way is to use a lint roller over the area first to gather up the larger particles that can easily be vacuumed away after that step.
Any remaining spots can be soaked up using either soap, bleach or rubbing alcohol depending on how much is left and what you're using. Keep in mind that most soaps contain colorants which can leave a lasting mark.
Make it together with kids!
When you want to get your kids involved with the process, you can get them to help you find or cut down sheets. You can also use their input for ideas on what types of materials might work well together.
When it comes time to set up, have them create different shapes while you secure all the pieces together. This gives them a sense of pride in being responsible for creating something special while they build it! Once everything's ready, let them explore and enjoy it while you watch until they get tired or bored with it - whichever comes first!
When you do something together, you can make it even more fun. For example, let one child hold the flashlight while you turn off the lights and get the other kids to go investigate! Or put on some music and have everyone dance around inside their own little enclosure.
How do I get rid of it?
Once you're finished playing or your children are done with their projects, just take down all your pieces and repurpose them for another time! If any pieces are relatively clean but could use a wash, toss everything in the washing machine so they'll be ready when you need to play again.
Just hang stuff up to dry so water doesn't damage anything while keeping labels intact so nothing gets accidentally thrown away! You can also throw blankets in there if they've seen better days.
No matter what type of blanket fort you make, the most important thing is to enjoy yourself and get creative! There's no limit on materials or size so try different things until you find what works best for your family!